Posted: June 24th, 2014 | Author: cj_000 | Filed under: Nest | 8 Comments »
Nest, a company recently acquired by Google, offers a variety of popular network enabled home utilities. The most popular of which is a thermostat that allows a user to control their household temperature remotely from their smart phone. This device, although seemingly useful, if not well protected can allow an attacker the ability to remotely monitor user’s habits or network traffic. Below, we will go into a method of attacking Nest brand thermostats by leveraging the device’s DFU mode to boot unsigned code at the boot-loader level. What this means in layman’s terms is that we are able to hijack the device’s code flow very early on, allowing us to make changes without ANY restrictions. Below we will describe the attack, our method of exploiting it, and our proof of concept code which allows a user to backdoor a Nest thermostat.
The Bug:
The Nest uses a CPU similar to the OMAP3630 series. This CPU features a Device Firmware Update (DFU) mode that can be accessed by holding down the Nest’s screen while off. This mode is intended for the manufacturer to easily diagnose and repair the device. Unfortunately, in the case of the Nest, this mode also allows us to modify the device without restriction.
The Attack:
Our attack on the Nest thermostat is simple, we use the device’s recovery mode to run our own modified boot-loader (stage one and two). We then use our loaded boot-loaders to initiate a Linux kernel that is used to modify the file system on the Nest. We then add a SSH server running as root as well as functionality to create a reverse SSH tunnel to a specified host using the Nest’s virtual drive.
NestAttack Rooting a Nest.
The Details:
The attack is all played out within the Nest’s DFU mode which is briefly mentioned above. This mode allows a user to push a set of images and addresses to be loaded through the device’s USB port with a utility called “omap3_loader”. DFU mode is only intended as a catalyst to load the next stages of code, the first of which in our case is the x-loader binary. X-loader is a stage 1 boot-loader that is used on the Nest as the initial loading point for the system. X-loader handles getting the device ready to execute the second stage boot-loader that is responsible for loading up the Linux kernel. On the Nest, the second stage boot-loader is an open source piece of software widely used on embedded devices known as “U-Boot”. We use our own custom modified version of U-Boot that is based on the GPL released Nest version to boot a Linux kernel. This Linux kernel is only used to access the Nest’s file system and add a cross compiled SSH server called Dropbear. This allows a user to connect to their Nest and obtain root access on their thermostat. After installing the SSH server, we move on to adding a SH script which checks the Nest’s virtual disk every 10 minutes for 2 files, a “host.txt” which contains a username and host in the “username@ipaddress” format as well as a “key.txt” which contains the RSA key for the SSH connection. If these files are found, the device connects out to a remote attacker at the specified address in the “host.txt” file and makes a reverse SSH connection. This allows remote access to a user’s thermostat and home network bypassing most firewalls. This process can be stopped at any time by placing an empty file with the name “stop.txt” within the root of the Nest’s virtual USB disk.
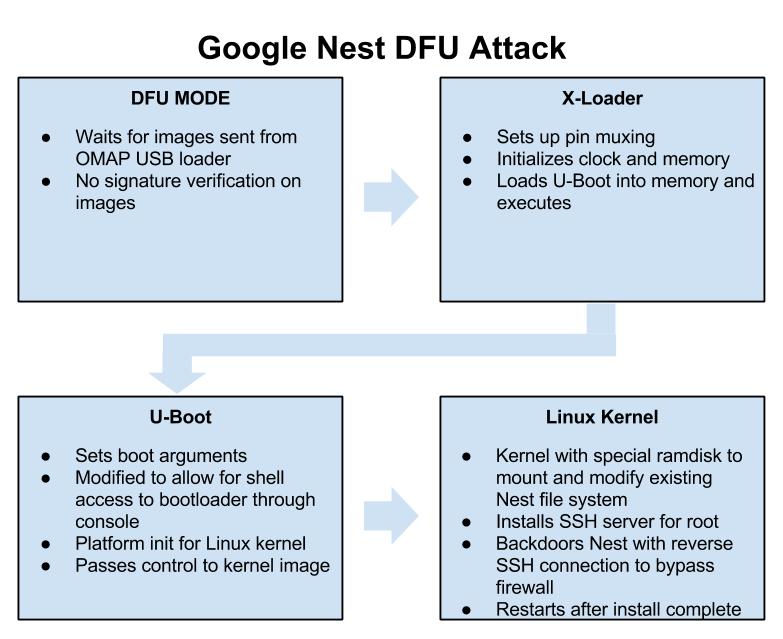
Google Nest DFU Attack
Exploitation:
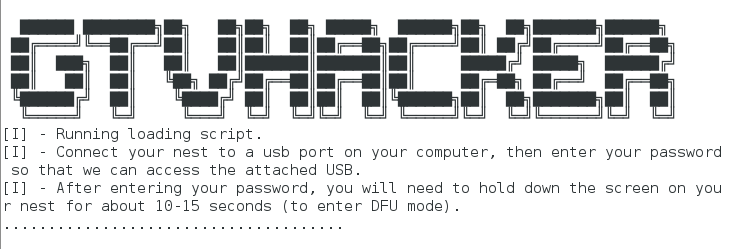
The exploit process is a single stage depending on your operating system:
- For Linux, run “NestAttack-Linux.sh”
These files push the built binaries to the Nest and handle rooting the device. This process takes less than a minute.
DEF CON:
We found this “feature” back in November 2013, and mentioned it publicly on December 5th, 2013 (see this tweet). Initially, we planned on releasing our findings at a conference this summer (along with new root methods for the Chromecast and Roku), but our talk was declined. Their loss!
We will, however, be speaking this year at DEF CON 22! Our talk, entitled Hack All The Things: 20 Devices in 45 Minutes, will feature unreleased exploits for 20 devices being released in a 45 minute period. If you are in Las Vegas this August, make sure to stop in!
Usage:
- Download package (Supports: Linux support only (more coming soon.)).
- Extract package.
- Run the appropriate attack script depending on your OS. Follow instructions after executing.
- Enjoy
Downloads:
You can get our pre-built packages for easy exploitation by using the following link.
Download NestAttack At Download.GTVHacker.com
We’re also in the process of open sourcing our build environment at:
GTVHacker GitHub – NestDFUAttack
Video:
DEF CON 22: Again, come check out our DEF CON talk this August in Las Vegas. Hack All The Things: 20 Devices in 45 Minutes, it will be awesome and there may be a special guest!
Posted: December 28th, 2013 | Author: zenofex | Filed under: Roku, Uncategorized | 12 Comments »
Hello Universe, welcome back. It’s been a while since our last post due to a lack of new Google TV hardware and developments. When we have free time we tend to look at other interesting opportunities that come our way and recently we came into just such a situation when we found ourselves auditing multiple Roku devices.
You may not know it by looking at the device, but the Roku is considerably more secure than most entertainment devices in its genre (even our namesake). The engineers at Roku not only implemented a decently hardened grsec kernel, they did it where we hadn’t seen before, on ARM. The layers above that contain a miscellaneous assortment of secure boot and encryption methods with configurations varying between the different chipsets throughout the platform. Our package leverages one such configuration, the bcm2835 chipset, in which user accessible per box keys are used to sign the initial “stage 1” portion of the bootloader. This allows us, from the initial root bug, to modify a portion of the system boot and remove signature verification checks. Effectively breaking the “chain of trust” established and allowing us to load any compatible image desired.

Now for the details. The initial root exploit utilizes a local command execution vulnerability within the developer settings menu of the device. Specifically, the bug is within the development password field, and due to poor sanitation of input, the bug lets us run commands as root. This affects the majority of updated Roku devices and was ironically introduced as a security improvement. The downside to this bug is that it does not provide a persistent root method (or, in short, a method that continues beyond system restarts). This left us looking for a method to persist root on the device, which is when we noticed the configuration of the bcm2835 Roku devices. In this chipset, the bootloader is signed by a per box key which, in all tested bcm2835 devices, is included on the box. By having the per box key we are able to break the chain of trust and load a modified “stage 2” bootloader image. In our case we modify the stock U-Boot to include the “dev=1” kernel cmdline argument that identifies a developer device. We then take advantage of a init.d script which allows us to place files in a non-signature validated portion of the file system that is executed when the “dev=1” kernel cmdline argument is set. We use this file to place commands to mount a replacement version of “/bin/Application”, Roku’s main content shell binary, to allow us to disable automatic updates on each boot.
We’ve packaged up all of the above into a nicely commented script which can be downloaded from our download servers at:
The file above contains a script with a cpio archive that includes the following 5 files:
- bpatch – compiled for the device and used to apply binary patches to files
- mtd1-uboot.patch – a patch file for bpatch used to patch the U-Boot portion of mtd1
- nandboot.patch – a patch file for bpatch used to patch nandboot.bin (stage1 bootloader)
- roku2-nandwrite.ko – a custom kernel module used to modify kernel cmdline in memory and trick the NAND driver into allowing bootloader writes.
- Application.patch – a patch file for bpatch used to patch /bin/Application to disable updates.
The entire GTVHacker team has put a lot of work into this release and we hope the Roku community enjoys it. We invite others to continue our work and are happy to share progress made while we work to further leverage the current exploits before a patch is released. In the mean time, if you have a second generation Roku, root it. And if you don’t, buy one quick!
This bug will probably get patched soon. So in other words, exploit now or forever hold your peace.
Posted: August 3rd, 2013 | Author: zenofex | Filed under: Uncategorized | 1 Comment »
Yesterday at the DEF CON 21 security conference we released our custom recovery package and 2 individual exploits for the Google TV platform. The 2 exploits leveraged together allow users to install the first custom recovery ever created on the Google TV. The first exploit is a vulnerability which affects certain Linux configurations, in particular those that mount NTFS drives without the nodev flag. This is very similar to a vulnerability we leveraged last year for unsigned kernels on the Gen 1 Sony Google TV where as both exploit poorly mounted flash drives. The difference in this being that the NTFS bug affects every device within the platform and allows users to rewrite previously non write-able (RO) mtdblock partitions. We use this exploit to drop a SU binary on the device within the /system partition which is not mounted nosuid. Of note, another valid method we could have used would have been to modify the build.prop file. Unfortunately, even as the root user, security features within the kernel prevent this from being used to allow much for the Google TV community.We can however leverage this exploit to obtain a larger attack surface on the device.
This leads us to our next bug which only affects the boot-loader on the second generation of Google TV devices. This bug is found within the initial loading of the Google TV kernel after the device performs its RSA verification. This can best be summed up by the picture below.
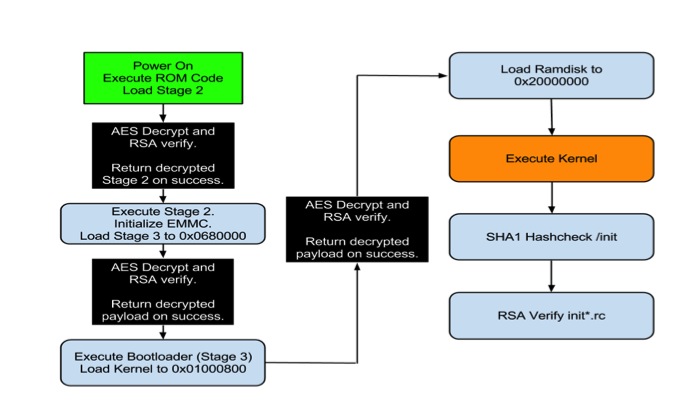
Boot process for second gen Google TV devices.
As you can see by the above picture, multiple levels of AES decryption and RSA verification are performed. In a secure boot environment this setup is called a “Chain of Trust” which, in more descriptive terms, means that each segment loaded during the device’s boot is signed and verified to establish that it is provided by the manufacturer and not a third party (like GTVHacker). Our attack is actually performed directly after the last AES decrypt and verification routine, which in particular verifies the authenticity of the kernel image being loaded. The bug lies in the fact that the majority of Gen 2 devices do not perform any verification on the loaded RAMdisk address which is stored in the kernel image header. By changing the RAMdisk load address in the image to actually point to the kernel load address and by attaching an unsigned kernel image to the RAMdisk. We are able to load an unsigned kernel directly on top of the actual signed kernel after all decryption and verification routines are performed. This method works on every device in the platform except the second gen devices by Sony. The Sony devices actually do check the RAMdisk that is supplied, but fail to do so correctly. By simply attaching another kernel and RAMdisk after the signed versions, and pointing the RAMdisk load address to this new kernel and RAMdisk we are able to bypass their signature checks. By using either of these techniques on the generation 2 devices we are able to completely destroy the chain of trust the device attempts to establish during boot and we are allowed to run any code needed, which in our case is a custom recovery image that does not perform any signature validation on update images.
Today we are releasing instructions on performing both attacks as well as our slides and content for the presentation. Please note that this process does involve flashing portions of the device, and in doing so there is a risk of bricking your Google TV. We’ve attempted to make this process as fail-proof as possible in order to prevent bricked devices, however we can’t guarantee that your device won’t become a glorified paperweight. With that being said, proceed at your own caution.
We will be open sourcing our code as well as compiling more custom recovery images for Google TV devices in the coming days. Keep checking our wiki, blog and Twitter for more info. In the mean time enjoy our DEF CON 21 content that we’ve spent a portion of our free time over the last year working on, and check out the video of the demo from our presentation below.
Posted: July 28th, 2013 | Author: cj_000 | Filed under: Uncategorized | 10 Comments »
 On Wednesday, July 24th Google launched the Chromecast. As soon as the source code hit we began our audit. Within a short period of time we had multiple items to look at for when our devices arrived. Then we received our Chromecasts the following day and were able to confirm that one of the bugs existed in the build Chromecast shipped with. From that point on we began building what you are now seeing as our public release package.
Exploit Package:
Our Chromecast exploit package will modify the system to spawn a root shell on port 23. This will allow researchers to better investigate the environment as well as give developers a chance to build and test software on their Chromecasts. For the normal user this release will probably be of no use, for the rest of the community this is just the first step in opening up what has just been a mysterious stick up to this point. We hope that following this release the community will have the tools they need to improve on the shortfalls of this device and make better use of the hardware.
Is it really ChromeOS?
No, it’s not. We had a lot of internal discussion on this, and have concluded that it’s more Android than ChromeOS. To be specific, it’s actually a modified Google TV release, but with all of the Bionic / Dalvik stripped out and replaced with a single binary for Chromecast. Since the Marvell DE3005 SOC running this is a single core variant of the 88DE3100, most of the Google TV code was reused. So, although it’s not going to let you install an APK or anything, its origins: the bootloader, kernel, init scripts, binaries, are all from the Google TV.
We are not ruling out the ability for this to become a Google TV “stick”.
Speaking of Google TV – if you are in Vegas for DEF CON 21, check out our talk – “Google TV: Or How I Learned to Stop Worrying and Exploit Secure Boot” this Friday August 2nd at 3PM in the Penn and Teller Theater! We’ve got secure boot exploits for the Google TV (unsigned kernels and roots anyone?) and more – don’t miss it!

How does the exploit work?
Lucky for us, Google was kind enough to GPL the bootloader source code for the device. So we can identify the exact flaw that allows us to boot the unsigned kernel. By holding down the single button, while powering the device, the Chromecast boots into USB boot mode. USB boot mode looks for a signed image at 0×1000 on the USB drive. When found, the image is passed to the internal crypto hardware to be verified, but after this process the return code is never checked! Therefore, we can execute any code at will.
ret = VerifyImage((unsigned int)k_buff, cpu_img_siz, (unsigned int)k_buff);
The example above shows the call made to verify the image, the value stored in ret is never actually verified to ensure that the call to “VerifyImage” succeeded. From that, we are able to execute our own kernel. Hilariously, this was harder to do than our initial analysis of exploitation suggested. This was due to the USB booted kernel needing extra modifications to allow us to modify /system as well as a few other tweaks.
We then built a custom ramdisk which, when started, began the process of modifying the system by performing the following steps:
- Mount the USB drive plugged in to the chromecast.
- Erase the /system partition (mtd3).
- Write the new custom system image.
- Reboot.
Note: /system is squashfs as opposed to normally seen EXT4/YAFFS2.
The system image installed from our package is a copy of the original with a modified /bin/clear_crash_counter binary. This binary was modified to perform its original action as well as spawn a telnet server as root.
After the above process, the only modification to the device is done to spawn a root shell. No update mitigations are performed which means that theoretically, an update could be pushed at any moment patching our exploit. Even with that knowledge, having an internal look at the device is priceless and we hope that the community will be able to leverage this bug in time.
Downloads and instructions for exploitation can be found on our wiki at: GTVHacker Wiki: Google Chromecast
Looking for help rooting your device or just want to ask us a question? Check out our Chromecast forum
Posted: May 22nd, 2013 | Author: zenofex | Filed under: Asus, GTVHacker | Comments Off on “CubeRoot” Pulled From Google Play Store
The inevitable has happened, the GTVHacker “CubeRoot” Android application has been removed from the Google Play Store. At 11:14 AM CST, I received the following automated message from “Google Play Support”:
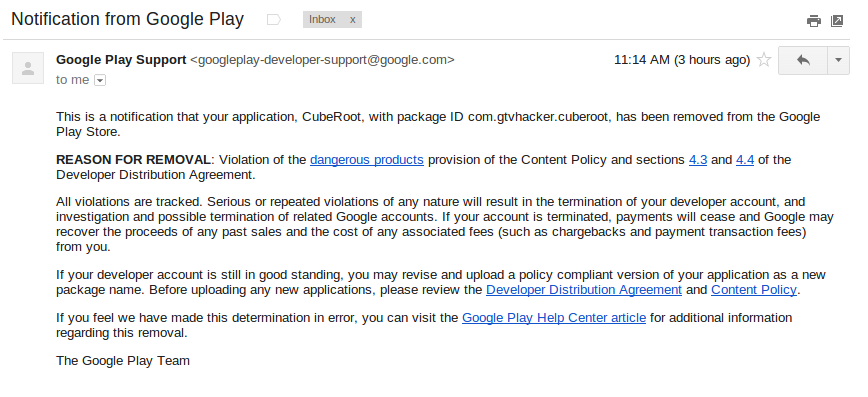
This honestly came as no surprise, we suspected that based on Google’s previous stance on the matter, our application would be removed from the market. However, it is interesting to be told the exact clause of the “Content Policy” that our app supposedly violated. Also, let it be noted that the GTVHacker CubeRoot application was listed on the Play Store for a total of 5 days.
As of today the Asus Cube is still vulnerable to the CubeRoot exploit. So even if you don’t plan on rooting your device with our exploit, you may want to consider using it solely for patching your device from attacks from malicious applications.
You can find a link [HERE] to download CubeRoot.apk.
Posted: May 17th, 2013 | Author: zenofex | Filed under: Asus, GTVHacker, Root | 5 Comments »
After almost 3 years of GTVHacker, we have continued to strive to bring the Google TV community the best “root” methods on the platform. To date we have released multiple methods for gaining root access on the first and second generations of devices. We’ve also released hardware roots and software roots but have yet to venture into Android application development, until now:
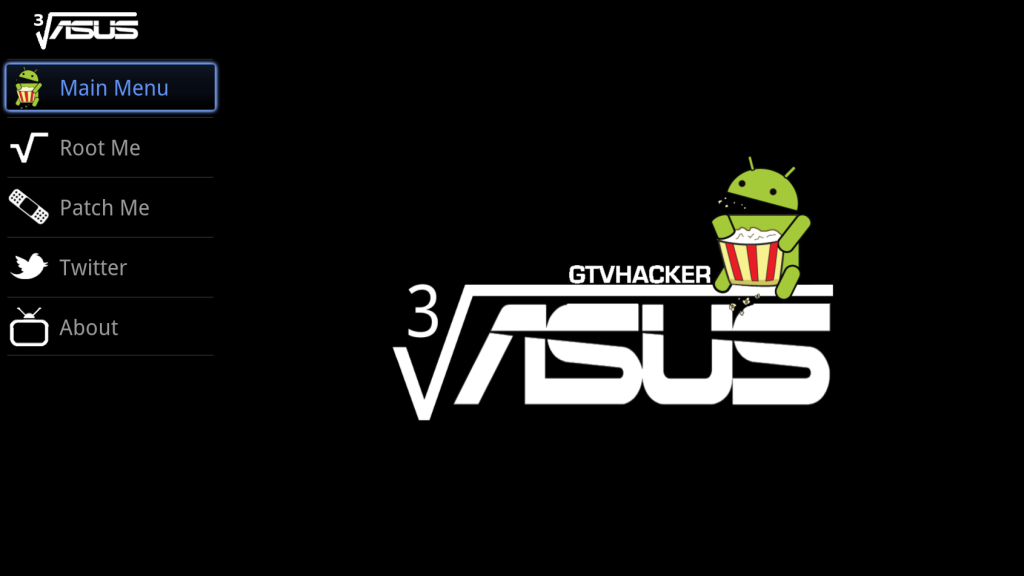
Let me introduce you to Cuberoot, a brand new root for the Asus Cube. This root leverages a local command execution vulnerability within a Unix socket for NFS mounting. This socket interfaces with a helper application that doesn’t properly sanitize input allowing local code execution. Luckily for us, this particular vulnerability is made better by being able to be exploited from within an Android app. “But with great power comes great responsibility”, and with such we’ve decided to not only provide the method for rooting the Asus Cube but also allow users an easy method of patching their device to prevent another application from exploiting the bug for nefarious reasons.
So, what will Cuberoot do?
Cuberoot will:
- Root your Asus Cube.
- Install SuperSu.
- Modify the Flash Player to bypass website blocks on streaming media sites.
- Disable automatic updates.
- Collect anonymous statistical information about your device.
- Allow you to patch this vulnerability, which prevents malicious applications from using this bug.
Download the app [Here] or Check out Cuberoot in action below:
UPDATE: Now in the Google Play Store!
Search for Cuberoot in the Play store, or click [Here] to install.
Posted: January 17th, 2013 | Author: zenofex | Filed under: GTVHacker, Netgear, Root | 1 Comment »
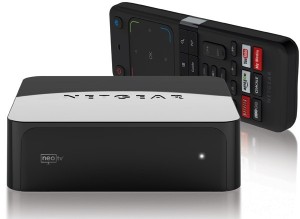
Netgear NeoTV Prime
We first broke news of the Netgear NeoTV Prime back in December, and have since been anxiously awaiting its roll out. Today the day arrived and we received our NeoTV Prime.
The NeoTV Prime uses the same form factor and hardware design as the Vizio Co-Star and Hisense Pulse. The box’s UI is a stock Google TV interface and is identical to some of the other Google TV devices.
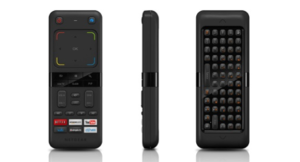
Netgear NeoTV Prime Remote
The remote however is much different than the rest, with a smaller size and thickness plus a clickable mouse, the remote is much easier to hold and use. Although the remote is well thought out, the D-Pad leaves room for improvement. Furthermore, there does not appear to be a microphone which means the voice search additions coming with version 3 may require an additional purchase.
On to the exploits!
What would be the point of a simple first look post without some exploits!? In fact, this root method may be simpler than the method we previously disclosed for the Hisense Pulse. While the last one required ADB, this method only needs a properly set up USB drive.
Software Method:
The NeoTV Prime runs a debug service called “testmode” which checks for a USB drive with a file named “.testmode” containing the magic string “testmodemark”. The system then checks to see if the file contains the magic string “testmodemark”. If the system finds the file, it sets the “persist.radio.testmode.enabled” property to 1 and reboots. Then, if the device detects this property as 1 upon boot, it attempts to copy and then extract a file named “test_mode.tgz” from the USB drive to /tmp/. After extracting, the system tries to run a sh file named “/tmp/test_mode/test_mode.sh”. Assuming we set the permissions correctly this file will allow us to run the payload of our choosing as root.

Netgear NeoTV PrimePwn Root Process
The Following are Automatically Performed:
- Installs SuperSu.apk
- Disables automatic updates
- Modifies flash plug-in to allow streaming of Hulu and other previously blocked content providers
Neo TV “PrimePwn” Root Process:
1.) Download PrimePwn.zip
2.) Extract the PrimePwn.zip to a Fat32 formatted USB drive. (test_mode.tgz, .testmode, README)
3.) Put the USB drive into your NeoTV Prime and reboot.
4.) Let the process run, it will reboot a few times and then will end at the home screen. (Approximately 3 minutes later)
5.) Remove your USB drive.
Demo Video
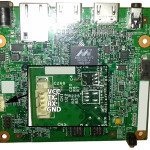
Netgear NeoTV Prime UART Pinout
Extra:
Netgear was kind enough to add an extra line in the init script that forces the hardware (UART) console to spawn as root. The box can be difficult to take apart and the software root is an easy process so we don’t recommend you use this method. We just wanted to mention its existence.
GTVHacker Wiki: Netgear NeoTV Prime
Enjoy!
Purchase at Amazon or Newegg
Discuss More…
Posted: January 3rd, 2013 | Author: cj_000 | Filed under: GTVHacker | Tags: Custom Recovery, Exploit, Generation 2, GTVHacker, Hisense, Recovery, Root, sony, Vizio | Comments Off on GTVHacker – A Brief History And a Sneak Peek
A little over 2 years ago a band of miscreants came together from an XDA developers forum post and started working together to get privileged code execution on the Google TV. Little did we know that the challenges would be greater than anyone could imagine.
 When the Google TV was released it was easily one of the most locked down Android devices containing a signature enforced bootloader which established a “chain of trust” between it and every component loaded thereafter. The hardened state of the kernel the device came with made things even worse, with the kernel enforcing module signing as well as lacking most of the popular Android vulnerabilities that were plaguing the mobile world. This Android device was truly unlike most others.
So we began work attempting to win an advertised cash bounty for being the first to gain root access on the newly released device. After some work, we posted the first root method for the Logitech Revue, winning a $500 prize. Since then it has been our goal to make Google TV an open platform by unlocking each released device. There were plenty of challenges along the way, in the form of long nights reversing code and many bricked devices. But along with the challenges there have also been many triumphs in the form of releases.
Going over some of our biggest acheivements in the last 2 years:
- Found and released a hardware root method for the Logitech Revue and assisted Dr. Dan Rosenberg in finding a software root exploit.
- Found and released multiple exploits for the Sony NSZ-GT1 and Sony Google TV television line, breaking the established chain of trust.
- Received a secret message from Logitech within the stock recovery on the Logitech Revue.
- Released our own customized and completely open Google TV kernel which utilized a chain of exploits to execute.
- Had the opportunity to present at the 20th annual “DEFCON” security conference in which we we teased a root exploit for the newly released NSZ-GS7 but are still waiting to leverage it until more hardware comes out.
- While working on porting the Boxee OS to the Google TV we found and released 2 exploits which have enabled the Boxee community to install a popular modification package known as Boxee+.
- We released a modification package for the Hisense Pulse which leveraged the intial debug configuration of the device for root, disabled automatic updates, and modified the flash plug-in allowing you to watch Hulu and other previously blocked content providers.
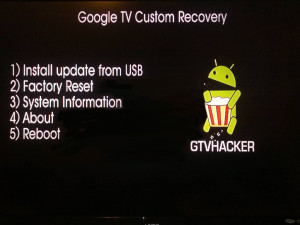 In regards to the future of GTVHacker, over the past month we found and have been developing an exploit which will allow for custom kernels to be run on most of the newest generation of Google TV devices. We’ve also (cj_000 specifically) been busy making a custom recovery specifically designed for the Google TV. You may already know this but, there are a number of differences between the Google TV and other Android devices and these difference make it impossible to simply build a popular AOSP based recovery or kernel image. Due to these differences, we had to make our own recovery from scratch. At the time of writing this it’s still in a beta phase and rather simple. It only allows for installation of an update.zip package from usb. This can be a modified update, a superuser binary and apk or whatever else you wish. We’ve also started adb over ethernet to allow for custom system changes that may require more interaction than a update package.
Below is a quick demo of the custom recovery mentioned above being tested on a Sony NSZ-GS7 Google TV device. We currently don’t have a release date set as we are trying to keep most of the specifics private in order to avoid an update that could patch the exploit before the community gets to utilize it. We just wanted to give the community a sneak peek at what we’ve been working on privately over the last few months. So sit tight, 2013 will be a great year for the Google TV and GTVHacker!
Discuss More…
Posted: January 1st, 2013 | Author: zenofex | Filed under: Hisense | Comments Off on Hisense Pulse – The Verdict is Accident
 If you remember our previous post about the Hisense Pulse and its original shipping configuration then you’ll remember that the device, unlike all others in the Google TV line, came almost completely unlocked. Specifically, it shipped with a hardware root shell in recovery and normal boot modes, as well as allowed adb to be rebooted as root with a simple command. At the time we were wondering based on how open this device was shipped, was this an accident or was this a show of support to the “customizing” Google TV community? Well the verdict is in after an update was released this morning patching all current Hisense Pulse root methods. In particular, the update that was released today (BOX_2.31a.C1204_E_release , download here ) changes the “ro.debugabble” prop to 0 causing the hardware root method as well as the “adb root” command to no longer work. At the moment there is no other public root method but don’t worry, if you haven’t updated yet you can still run our “Pulse Modification Package” from the Hisense Pulse section of the wiki which disables automatic updates. Also, if you haven’t purchased a Pulse yet or have one already on the way, the Pulse will continue to ship “unlocked” for the time being. If we use the Logitech Revue as a reference point, since it shipped with hardware root shell in recovery mode until it was discontinued, newly purchased Pulse units may never be patched but will need to be rooted before their initial setup.
It’s sad to find out that the little bit of hope we had about this being a show of community support, as opposed to an accident, is now gone. We will continue to help the community “free” their devices as we have on the rest of the Google TV platform while hoping for the much needed release of a true Google TV “Nexus” device.
Discuss More…
Posted: December 22nd, 2012 | Author: zenofex | Filed under: GTVHacker, Hisense, Root | Tags: google, Hisense, Pulse, Root, TV | 2 Comments »
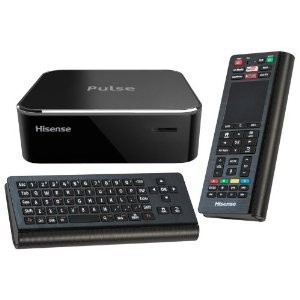 The day has finally arrived, the Hisense Pulse has launched and is finally in our hands. Upon first look we were impressed with the speed of navigation from within the menus. If you have experience with the previous generation of the Google TV platform then you’ll recognize the Pulse’s UI which seems to be almost identical to that of the Logitech Revue. The form factor of the Pulse is similar in size and shape to that of the already released Vizio Co-Star, and the motherboard layout makes it seem like they used a similar design. One difference between the Co-Star and the Pulse is that the Pulse’s remote is much more intuitive and its use feels more natural. All together it’s exactly what someone would expect for another device in the Google TV family but with one of the cheapest prices in its generation.
Our biggest and most unexpected surprise came within moments of our first examination of the Pulse. Upon receiving any new hardware, partially because of our previous experience with the Revue, we like to start off disassembling the hardware even before powering on a device. After doing so in this particular instance we found that a hardware root-shell is enabled by default through the serial console header on the device’s motherboard. Better yet, the root-shell is available in both recovery and normal boot which allows for tinkering of the device in both modes of operation. 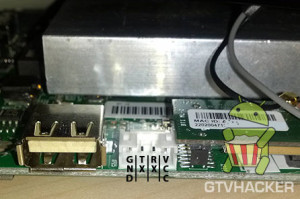 While we’ve seen serial consoles left in prior Google TV devices (see: Logitech Revue), we had yet to see a Google TV device that included a shell within both normal and recovery mode, let alone one in the second generation of the Google TV platform. While leaving a hardware shell leaves the box almost completely vulnerable its use still requires some soldering experience. However, after further exploration we noticed a 4 pin header on the Pulse PCB which allowed us to simply plug in a common connector and avoid soldering all together! This adapter is conveniently in a location that can be accessed by either temporarily opening the device and plugging in the adapter, or for more permanent use, by cutting a hole in the side of the case. The ease of access to the pin header as well as the obvious oversight of the serial console was just the beginning of our findings.
After finishing up our quick analysis of the hardware we finally had the opportunity to explore how the device’s software side was configured. We found that even with the hardware root oversight being as unexpected and less secure than any of its counter parts, the software side was worse. After browsing through the system’s init scripts, and checking the props, we noticed that a simple “adb root” to the device would restart adb as root therefore providing us with a root shell via adb.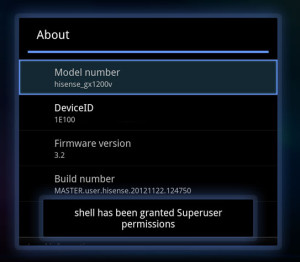
Why is this device so much less secure than any of the other Google TV devices? Is this an oversight, or did someone at Hisense purposely leave it there to show community support? We hope that someone did this purposely as it would be great if a manufacturer or Google finally embraced the modding community, but it was probably just an oversight.
Knowing this, we thought it would be best to release our findings for the community as soon as possible as it will likely be patched quickly with the next automatic update. However, if you do have a Hisense Pulse and would like to take advantage of root before it’s possibly patched. We have a package that will perform a few community desired modifications such as:
- Install Superuser.apk and su binary to device.
- Patch flash player to allow content to be played from previously blocked websites (Hulu, Fox, CBS, NBC, etc.).
- Disable automatic updates to preserve root (can easily be reversed).
You can find information on our modification package at the GTVHacker Wiki page for the Hisense Pulse
We have more coming soon, check back around the first of the year for a sneak peek at something even more awesome than this!
Looking to purchase a Hisense Pulse and also want to support GTVHacker? [Use this link to purchase at Amazon]
Discuss More…


